Table of Contents 2
Please create a "Table of Contents Prototype" in Word so that it looks like this PDF file.
https://guides.lib.umich.edu/c.php?g=283073&p=1886010
Learn how to:
- Create
an Automatic Table of Contents
- Create
Automatic Lists of Figures, Tables and Equations
- Including the Appendix in the Table of Contents
Automatic Table of Contents
An automatic Table of Contents uses Styles to keep track of page numbers and
section titles for you automatically. Microsoft Word can scan your document and
find everything in the Heading 1 style and put that on the first level of your
table of contents, put any Heading 2’s on the second level of your table
of contents, and so on.
If you want an automatic table of contents you need apply the Heading
1 style to all of your chapter titles and front matter headings (e.g.
“Dedication” and “Acknowledgements”). All major headings within your
chapters should be use the Heading 2 style. All
subheadings should use Heading 3, and so on.
If you have used Heading styles in your document, creating an automatic
table of contents is easy.
- Place
your cursor where you want your table of contents to be.
- On the
References Ribbon, in the Table of Contents Group, click on the
arrow next to the Table of Contents icon, and select Custom
Table of Contents.
- If you
want to change the style of your table of contents (e.g. you want more
space between the items on level 1 and level 2 of your table of contents,
or you want all your level 1 items to be bold), click on the Modify
button, select the TOC level you want to change, then click the Modify
button to do so.
- If you
want to change which headings appear in your table of contents, you can do
so by changing the number in the Show levels: pulldown.
- Click OK
to insert your table of contents.
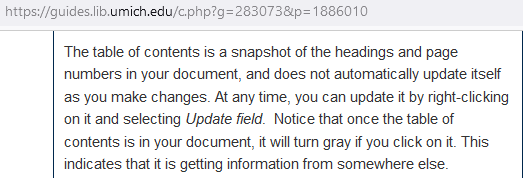
The table of contents is a snapshot of the headings and page numbers in your
document, and does not automatically update itself as you make changes. At any
time, you can update it by right-clicking on it and selecting Update field.
Notice that once the table of contents is in your document, it will turn gray
if you click on it. This indicates that it is getting information from
somewhere else.
Automatic Lists of Figures, Tables and Equations
If you have captioned your figures, tables, and equations using Word’s
captioning feature (see the Inserting Captions tab to the left of
this Guide), you can have Word generate your lists for you automatically.
- Place
your cursor where you want your list to be.
- On the
References Ribbon, in the Captions Group, click the Insert Table
of Figures icon (even for lists of tables and equations).
- In the Table
of Figures dialog box, select the label for which you want to make a
list from the Caption Label pulldown (such as "Equation",
"Figure", or "Table").
- If you
want to change the style of your table of contents (e.g. you want more
space between each item in the list), click on the Modify button,
select the Table of Figures style, then click the Modify button
to do so. Click OK when you are done.
- Click OK
to insert your table of contents.
Repeat these steps to insert other lists into your document (Rackham
requires separate lists for tables, equations, figures, and any other label
you’ve used). A List of Appendices is handled differently - see the box
below.
Appendices
An important thing to remember when dealing with appendices
is that the Appendices section heading must be included in the Table
of Contents, but each individual appendix cannot be included. In addition, if
you have more than one appendix, you must include a List of Appendices section
to your frontmatter. We'll do that by creating a new style for the individual
appendices, and then we'll use the Table of Contents tool to create the List of
Appendices.


Comments
Post a Comment